Create Estimate
To create new estimate go to Sales -> Estimates -> Create New Estimate or by clicking on the Build icon on the top left side and click Create Estimate
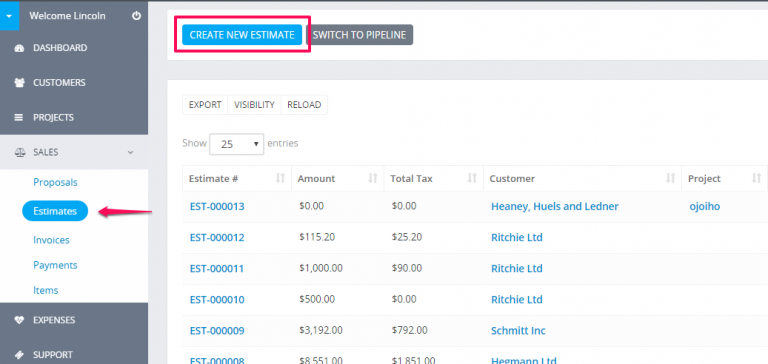
Client – Before selecting a client you must have added clients Customers->New Customer.
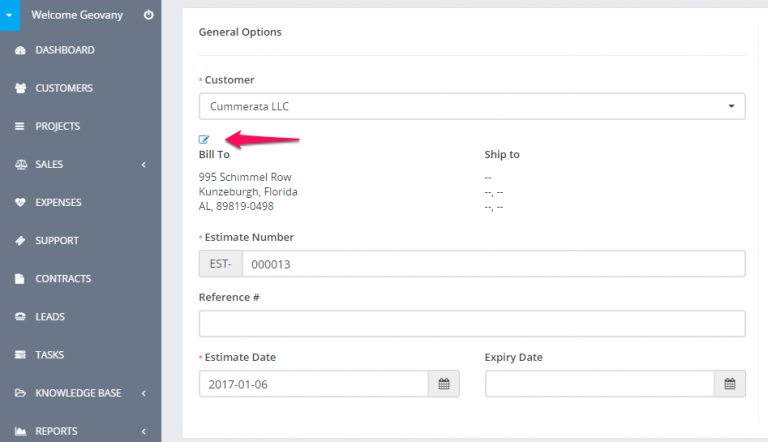
When selecting a Customer the customer informations will be fetched directly from the customer profile you created. Another option is that you can click on the edit icon and directly add the desired customer informations, this also is applied for the billing informations they are also fetched when selecting a customer.
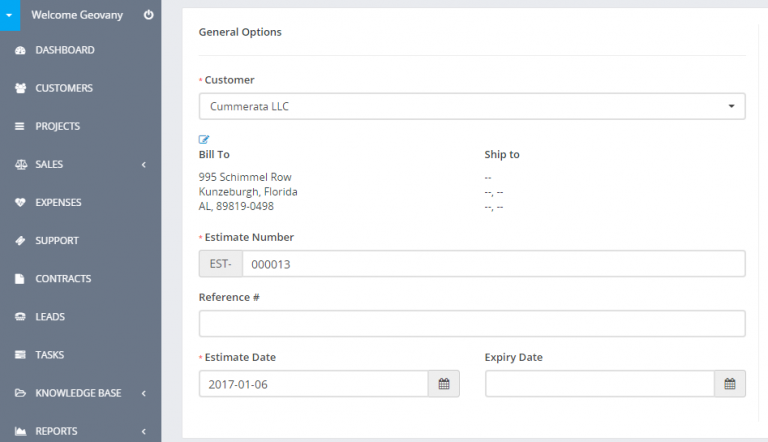
Billing and Shipping – If you change the billing and shipping informations after slecting a client and click on the edit icon, this will be changed for the Estimate but in the customer profile the informations will remain the same and wont be any changes in the Invoice.
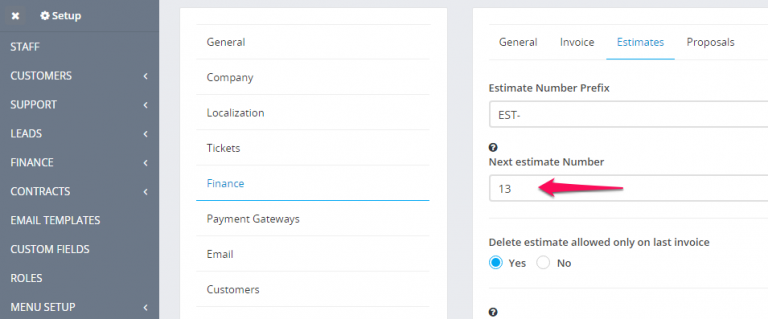
Number – Number is automatically populated Eq. 001 next will be 002.
This number its fetched from Setup->Settings->Finance->Estimates – Next Number the number its auto increment but you can change the next number in Setup->Settings->Finance->Estimates.
Status – By default the draft status will be selected, you can change the status anytime you want, note that when you send the estimate to your customer the status will be change auto to SENT.
Currency – The currency is automatically selected based on your default currency or currency set for the selected Customer you selected previously in the customer profile. If the currency for this customer is USD it will be automaticly selected and cannot be changed, read more here
Sale Agent – You can select sale agent for this estimate then then generate reports in Reports->Sales->Estimate Report. Note that the sale agent full name will be shown on the estimate if in Setup->Settings->Finance->Estimates -> Show sale agent on estimate is set to yes.
You can add Estimate items, when adding make sure u click on the blue check icon in order the item to be added you can also select tax options see shown in picture.
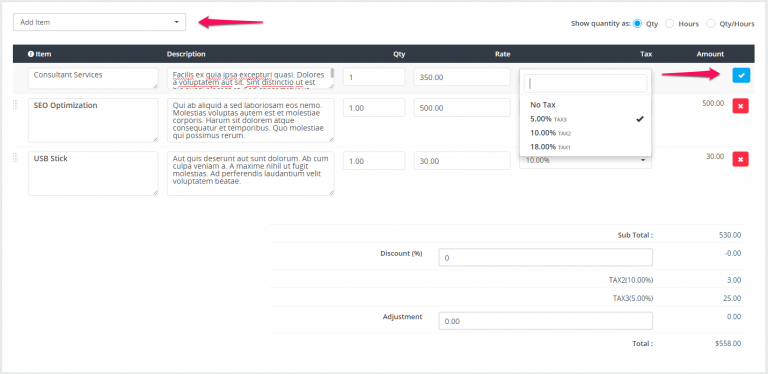
The items will be stored separately for each estimate and changing the items informations in Sales->Items wont affect the already created estimates with specific item/s.
Admin note is only for admins/staff members.
Customer note is visible to client side also, on the HTML estimate and PDF estimate.
You can setup terms directly in the estimate or you can have predefined terms which will be auto populated. To setup predefined terms and conditions navigate to Setup -> Settings -> Finance -> Estimate scroll down and you can populate the fields as it fits you.

Click submit to save the estimate.
While editing/creating estimate the adjustment option is always available if you want to +- the total amount
Related Articles
Link Estimate To Project
Go to Menu -> Sales -> Estimates and click Create New Estimate Select customer. A drop-down with projects will be shown below the customers select field (if no projects associated with the selected customer the dropdown with projects wont be shown) ...Create proposal
Create a proposal From the main menu navigate to Sales->Proposals and on the top left side click the Create Proposal button You can create a proposal to lead or to a customer. Choose Related to Lead or Customer. Choose which lead/customer is related. ...Create Invoice
To create new invoice go to Sales -> Invoices and click on the button Create new invoice Select Customer, when selecting a Client the customer information's will be fetched directly from the customer’s profile. Another option is that you can click on ...2.2: Create Button
Let's break down the magic behind the "Create" button on BIMeta, just click on the button: Create Button Guide: Create the Album: Click here to craft a personalized photo album! Gather your favorite moments, add captions, and share your visual ...2.2.5: Create Company
Launching your company on BIMeta, Fantastic! Here's a simple guide for the "Create Company" tab: 1. Click "Create Company": Find the "Create Company" tab and give it a click. Time to showcase your company's awesomeness! 2. New Page Opens: · A new ...